 In my last article I tried to outline Magento way of displaying custom product collection using custom controller action at store frontend. I also made a promise to write a follow-up on the topic covering adding layered navigation to custom controller action with goal of making your product collection easier to navigate. For purposes of writing this article, I'll shift my focus back to Magento extension for managing catalog price rules based sale items, code I originally wrote to demonstrate adding custom layered navigation filter in Magento in one of my previous articles. As a part of this extension, I also created custom controller action used to display only sale items and added the layered navigation to that controller action, something I'll do my best to explain here.
I'd like to start by pointing out that the best instructor you could possibly find is Magento itself. I say this because most of the following code is derived from existing Magento code, and if it happens that you require something more challenging after reading this article, I'll point you in the direction of Mage_CatalogSearch module.
So what was my goal with Inchoo_Sale Magento extension I'm about to present in this article? Usual approach to creating any specialized area showcasing products in Magento is to create the category as usual, and do a cron to populate this category with special items (sale items, featured items, whatever) periodically. My idea was to fake the sale items category but reuse everything category page has to offer, including layered navigation, in order to accomplish the goal of creating sale area for the store. So lets proceed with a little XML.
1 2 3 4 5 6 7 8 9 10 11 12 13 14 15 16 17 | <?xml version="1.0" encoding="UTF-8"?> <layout version="0.1.0"> <inchoo_sale_index_index> <update handle="catalog_category_layered"/> <!-- Remove Magento layered navigation --> <remove name="catalog.leftnav"/> <!-- Add sale specific layered navigation --> <reference name="left"> <block type="inchoo_sale/catalog_layer_sale" name="inchoo_sale.leftnav" after="currency" template="catalog/layer/view.phtml"/> </reference> </inchoo_sale_index_index> </layout> |
What we're doing here is loading catalog_category_layered handle layout update, and adjusting the XML for our use case. That's the re-usability part. Basically, we're removing all other layered navigation blocks to be replaced with our own inchoo_sale/catalog_layer_sale designed to be used together with our sale controller action.
So here's our layered navigation block code, one that's added to layout by preceding XML, at our controller action handle:
1 2 3 4 5 6 7 8 9 10 11 12 13 14 15 16 17 18 19 | <?php class Inchoo_Sale_Block_Catalog_Layer_Sale extends Mage_Catalog_Block_Layer_View { protected function _construct() { parent::_construct(); /* To get picked up by Mage_Catalog_Product_List::getLayer() */ Mage::register('current_layer', $this->getLayer(), true); } public function getLayer() { return Mage::getSingleton('inchoo_sale/catalog_layer'); } } |
Here we instruct our block to use our custom model instead of Mage_Catalog_Model_Layer because this is where we'll instruct layered navigation model to use root category collection limited to sale items, as starting point for layered navigation. The constructor code where we place layer model instance into Magento registry is a little trick picked up from Mage_CatalogSearch and it's used to instruct Mage_Catalog_Product_List not to use Magento default layered navigation model. So let's proceed with model code:
1 2 3 4 5 6 7 8 9 10 11 12 13 14 15 16 17 | <?php class Inchoo_Sale_Model_Catalog_Layer extends Mage_Catalog_Model_Layer { public function prepareProductCollection($collection) { parent::prepareProductCollection($collection); $collection ->getSelect() ->where('price_index.final_price < price_index.price'); return $this; } } |
No surprises here, we simply use price indexer information to limit root category product collection to sale items. What's left to explain is our controller action code:
1 2 3 4 5 6 7 8 9 10 11 12 13 14 15 16 17 18 19 20 21 22 23 24 25 26 27 28 29 30 31 32 33 34 35 36 37 38 39 40 41 42 43 44 45 46 47 48 49 50 51 52 53 54 55 56 57 58 59 60 61 | <?php class Inchoo_Sale_IndexController extends Mage_Core_Controller_Front_Action { public function indexAction() { Mage::dispatchEvent( 'catalog_controller_category_init_before', array( 'controller_action' => $this ) ); $rootCategoryId = (int) Mage::app()->getStore()->getRootCategoryId(); if (!$rootCategoryId) { $this->_forward('noRoute'); return; } $rootCategory = Mage::getModel('catalog/category') ->load($rootCategoryId) // TODO: Fetch from config ->setName($this->__('Sale')) ->setMetaTitle($this->__('Sale')) ->setMetaDescription($this->__('Sale')) ->setMetaKeywords($this->__('Sale')); Mage::register('current_category', $rootCategory); Mage::getSingleton('catalog/session') ->setLastVisitedCategoryId($rootCategory->getId()); try { Mage::dispatchEvent('catalog_controller_category_init_after', array( 'category' => $rootCategory, 'controller_action' => $this ) ); } catch (Mage_Core_Exception $e) { Mage::logException($e); return; } // Observer can change category if (!$rootCategory->getId()){ $this->_forward('noRoute'); return; } $this->loadLayout(); $this->_initLayoutMessages('catalog/session'); $this->_initLayoutMessages('checkout/session'); $this->renderLayout(); } } |
Here we do all we need in order to fake our sale category like setting root category model into registry to be used by Mage_Catalog_Block_Category_View, and faking things like category name, title, meta title, meta description etc. We also trigger couple of standard events in an effort to preserve any functionality from other modules depending on these events. Most of the code here is picked up from Mage_Catalog_CategoryController::_initCatagory() and modified for our purpose.
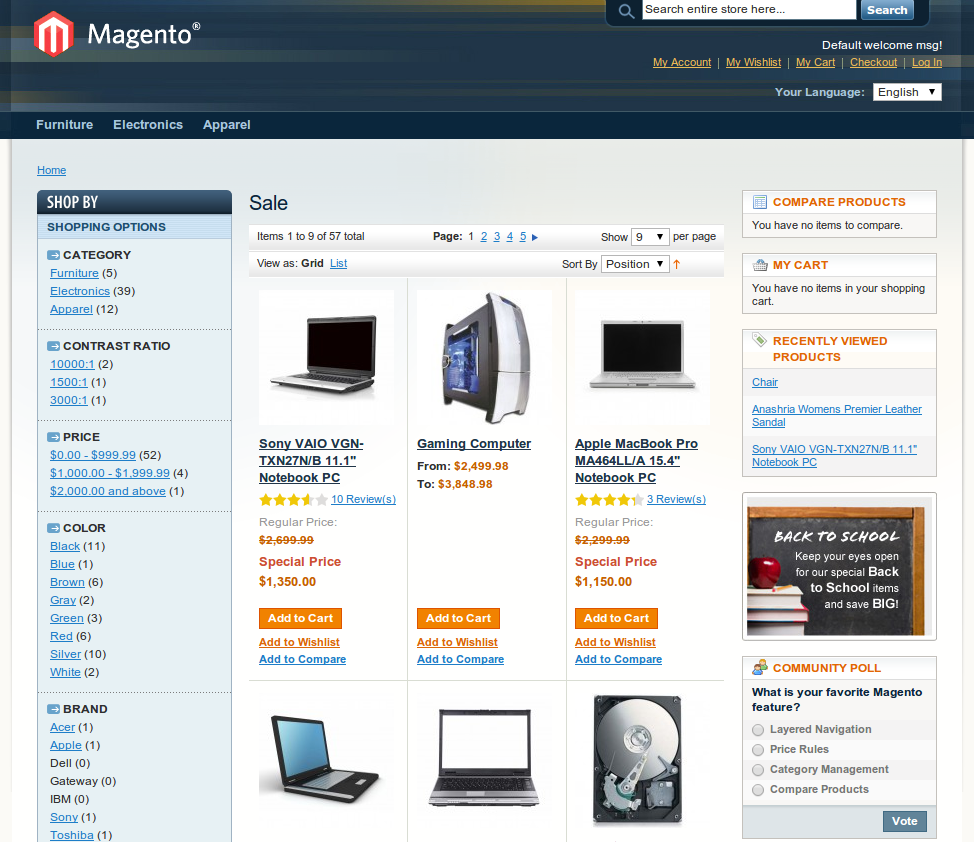
Since this was our last step, we now have a fully functional layered navigation at our custom custom controller action, showcasing our store sale only area. This was simple, huh? If you look at the results at store frontend by visiting your custom controller action (sale/index/index in my case), these do not differ in any way from an ordinary Magento category.
If you don't feel like copy pasting and filling in the blanks (these were only snippets), you can visit GitHub repository page for Inchoo_Sale, Magento extension these code snippets are taken from.
That's all for today, next on my todo list is to write an article on how to integrate your custom controller action like the one used here, with Magento Enterprise Edition full page cache. If you're interested, stay tuned for more.
Hi Marko,
Downloaded from gitHub installed in my Mage setup backend its showing enabled. Frontend sale/index/index its shows 404
Downloaded from gitHub installed in my Mage setup backend its showing enabled. Frontend sale/index/index its shows 404
How can I do same thing in magento 2??
Hi,
sure you can.
Regards,
Marko
Hi Marco,
I want to have a list of all category products in magento frontend in line under the category name.
Help me PLEASE….
Can you share this for Magento 2 Please?